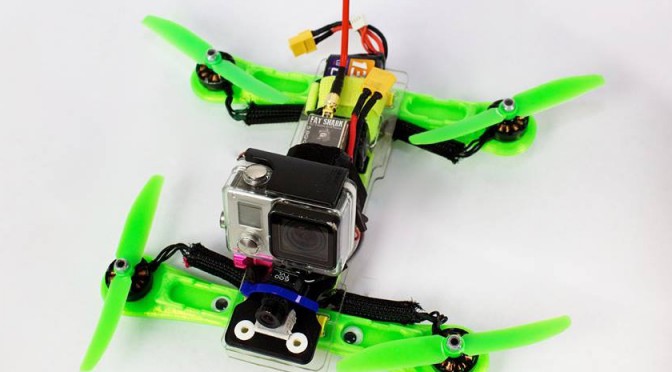
Today Benjamin from Austin, TX sent me his Kickstarter campaign for the Zippy, a 3D printed quadcopter frame only held together with zip ties. While there are tons of interesting Kickstarter campaigns I think this one is worth mentioning as it proposes a conceptually new and simple way of building a quadcopter frame inherently designed to be easily repaired and fine tuned out in the field. Exactly what a crash pilot like me would need to advance in FPV racing. Genius!
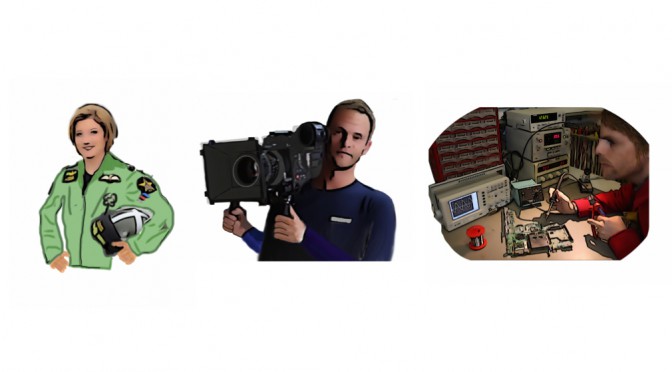
Quite often I get asked, “which is the best quadcopter?” or “which drone should I buy to get started?” There is no simple answer besides; “It depends”. In my experience it largely depends on your main motivation to fly a quadcopter. So the better question is: What is your Drone-Personality? Are you a Pilot, a Cameraman or an Engineer? May I present the FPVblog Find your drone guide! 😉 Continue reading Find your drone guide part 1: Drone-Personality→
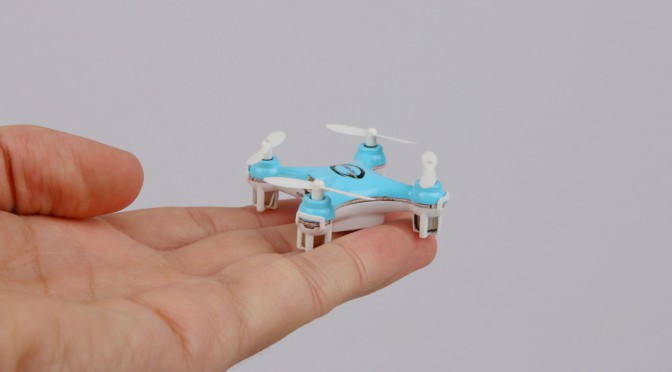
At just 40mm wide the Blaxter X40 looks very much like a small toy model with a bunch of blinking LEDs and very unlikely to actually fly. The kids’ hand-sized remote control adds to the whole impression of a non-functional mockup. So the surprise is all the bigger when the little guy actually takes off. It’s a real quadcopter! Continue reading Honey, I shrunk the … quadcopter→
The 2nd TBS Discovery Pro arrived in a similar, but slightly lighter colored box.
The new gimbal dampener arrived with the wrong number of screws. I should have some spare ones left from the last build.
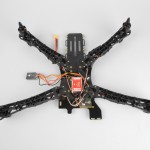
My 2nd TBS Discovery Pro came with the new improved gimbal dampening arm attached to the back. It should stabilize the camera at high speeds.
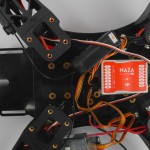
The new gimbal stabilizer will go deep into the frame, close the the NAZA in order to stabilize the camera rotational movements.
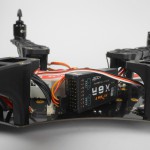
In order to fit everything, the NAZA controller is placed slightly forward outside the marked rectangle. This way, the edge of the X8R is just short of to the mounting hole for the red spacers which will later connect to the top plate.
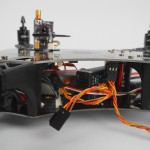
The X8R antennas can be zip tied to the arms. Both, the antenna and the arms, have a rounded shape which makes the placement relatively flush and solid. The zip ties keep them in place, minor movement is still possible.
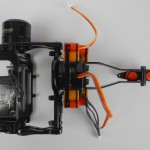
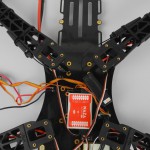
Closeup of the X8R lying sideways inside the frame.
Different angle of the frisky X8R placement inside the frame, flush to the NAZA.
The X8R is placed lying on the side, with the short cables going out to the antennas on the two arms.
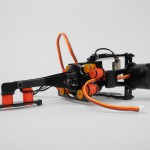
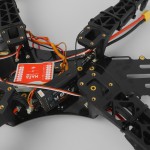
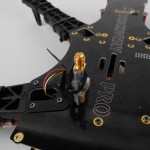
On my 2nd build, I’ve placed the video transmitter on top. TBS sells a special mount, which is not part of the kit and needs to be ordered separate.
Here I use a FLAME WHEEL VTX mount with a TBS 5.8GHz transmitter
This time I’ve attached the NAZA LED IMU to the bottom of one of the ESCs.
On my second build I try to cram the X8R receiver inside the frame, next to the NAZA with the two antennas on the back arms.
The image gallery of the first build can be found here.
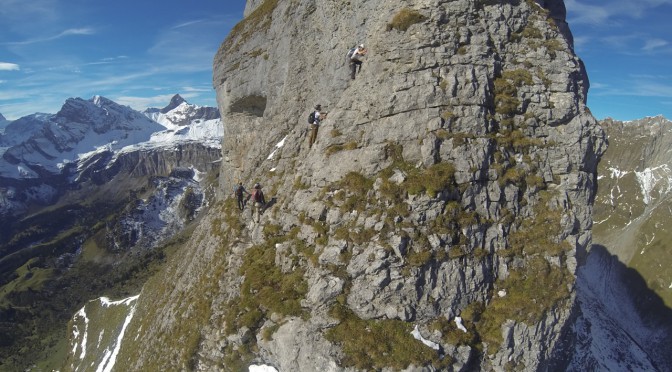
Last fall, I was climbing with some friends in Braunwald, Switzerland. We have a perpetual tendency to get ourselves into troubles. Luckily, we brought a helicopter with us, which got us back down safely. Or was it the other way around?! Watch yourself!
I’m just back from my trip to Indonesia, a beautiful country with big contrasts, lovely people and impressive volcanoes. On my journey in November 2013 I visited two islands, first Java and then Lombok. In my backpack I am not only carrying a GoPro but also the Phantom quadcopter 🙂 I thought it would be the perfect opportunity to take some great shots and videos at very unique locations. But please see yourself.
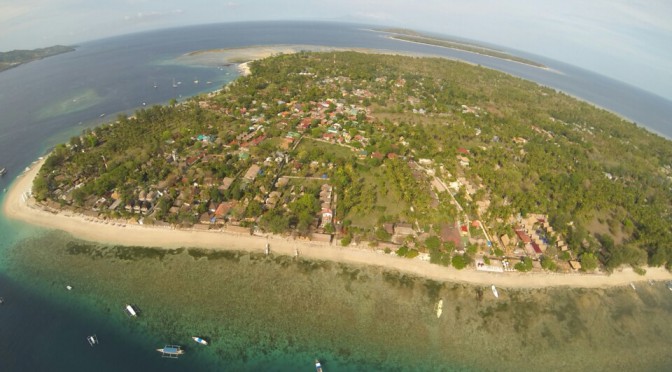
Gili Air, one of the three Gili islands off the coast of Lombok, Indonesia. Photo taken with the GoPro on a Phantom copter.
In the following days I would like to share with some of the nice spots I was visiting with the copter:
Ijen crater, a volcano and sulfur mine at the same time. I was there at night to catch the blue flames and inhale some nasty stinky sulfure clouds.
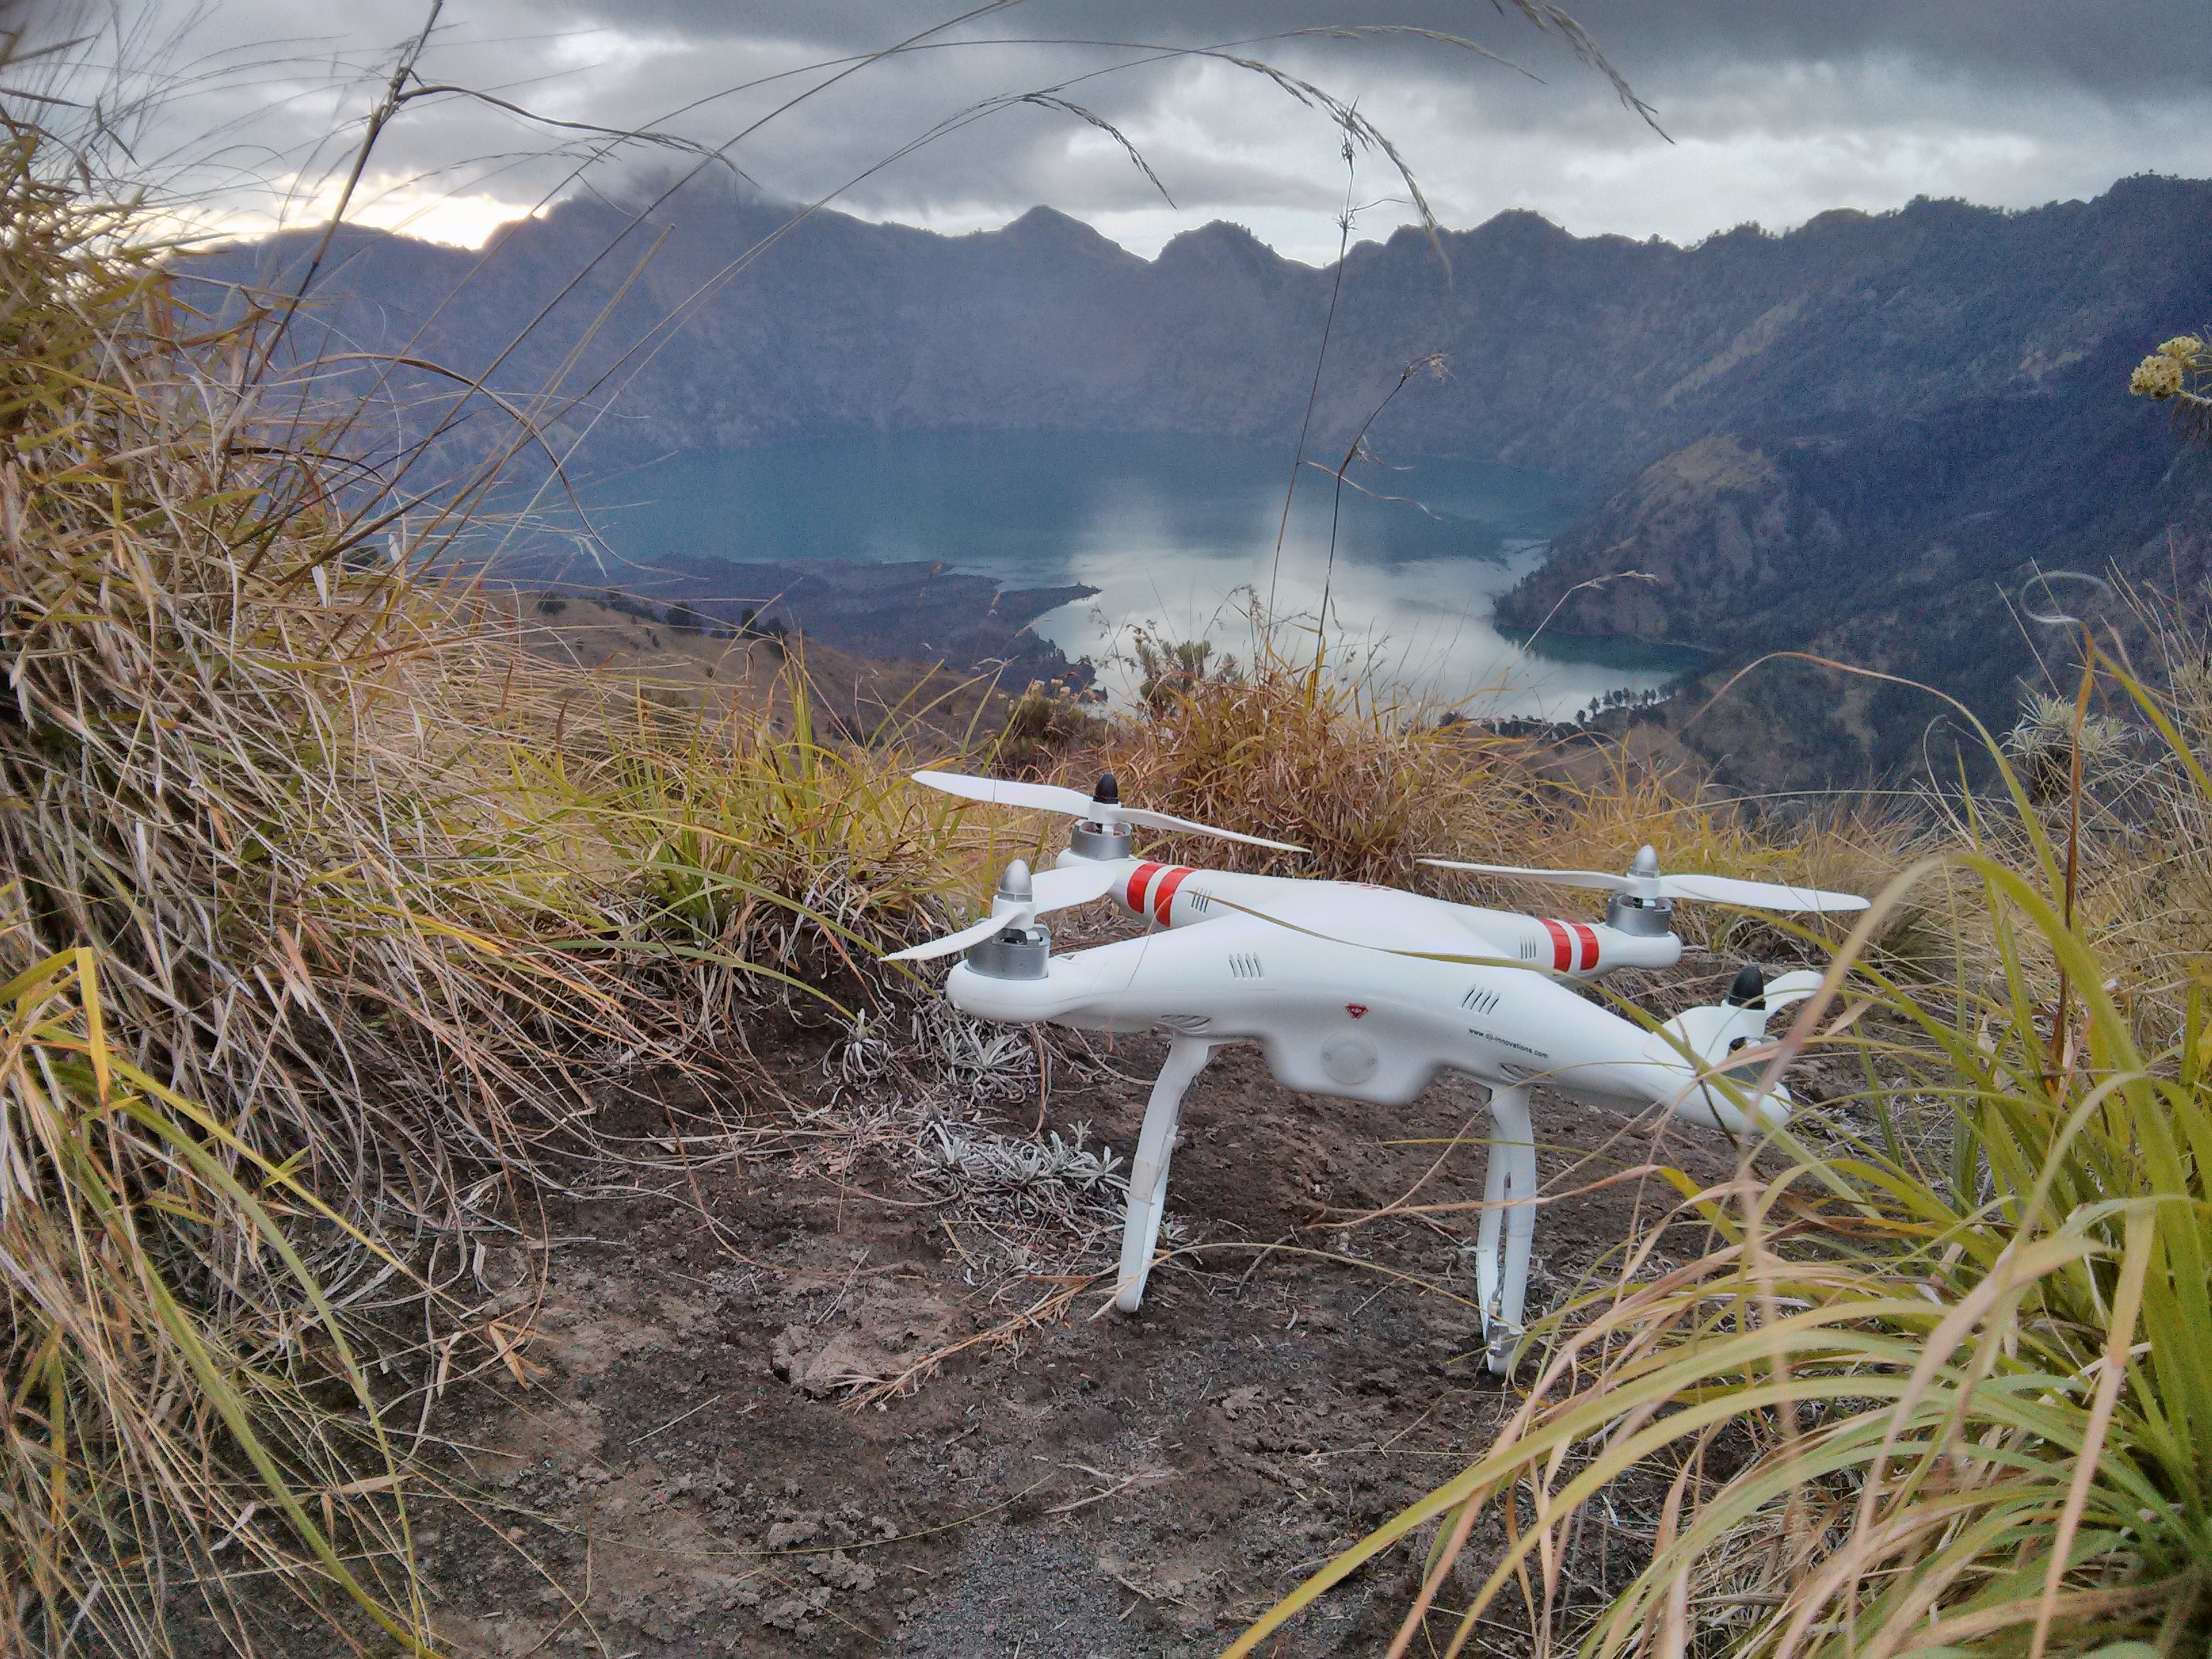
Mount Rinjani on Lombok. It is the second highest mountain in Indonesia with 3726m above sea level. We hiked all the way to the top in three days. Check out the video!
Gili Air, tropical island off the coast of Lombok with is great for snorkeling and relaxing.
I am still sorting through the Gigabites of photos and videos. Please be patient for the final videos to be edited and uploaded. But they are coming!
Mount Rinjani crater lake on Lombok, Indonesia.Ijen crater in east Java.
Advice for traveling trough airports
I had no problems at all at the airports in Indonesia. I guess they don’t really know what it is, but I also never had to open the bag for special inspection. I just followed the general ‘air travel’ regulations, which request, that you put the batteries into the carry-on (FAA rules). There are no regulations regarding the drone (electronics) itself. The airports in Europe and the bigger hubs in asia (e.g. Singapore) usually know the rules for batteries very well. The www.fpvlab.com forums are a great resource for travel reports, especially flying through exotic airports.
Packing the Phantom for air travel
I’ve put the phantom, remote and charger into the check-in bag. I removed the landing gear and propellors to fit it into a large backpack. The batteries and the GoPro went into the cary-on. I had no space for the Phantom there, but that should work too. In case they want to open your bag at security, always tell them first, that you have batteries inside. Sometimes, security personnel gets scared by the look of batteries.
Getting around in Indonesia with a drone
In Indonesia itself, people have rarely seen a drone. Therefore, they are mostly curious and a bit anxious at the same time. People ususally just watch from a distance, sometimes people start talking with each other. Sometimes they approach you. They are always friendly and just want to talk and find out what the white thing is that you bring and fly. When asked for the price of your toy, you might not want to give exact numbers to any stranger. Given the average daly income of $5 in Indonesia, your toy might look absurdly expensive.
When walking around / hiking, I had the phantom hanging off the backpack. In order to attract less people I usually put a rain-cover over the phantom, so people can’t see the drone. This makes it easier for you to get around without explaining to everyone what that white thing is you are carrying….
This is part 2 of the epic TBS Discovery Pro build. It got a bit delayed because I really wanted to show you the Leistkamm Video before finishing my second quadcopter. But now, back to the Discovery Pro.
After assembling the gimbal and motors and soldering the bottom plate in the TBS Discovery Pro build part 1, I put all the pieces together. It’s relatively straight forward to mount the four arms and red spacers to the bottom plate and then close up the sandwich with the top pcb plate. All the electronics and wiring is integrated into the frame and aside from the gimbal and controller, there are only a few cables connecting to individual parts. During the build I got to appreciate zip-ties for fixing all sorts of things, such as the electronic speed controllers (ESCs) onto the arms and the flight camera to the frame. The last piece I screwed on was the gimbal and it slides from the front.
Wrongly assembled gimbal. The tilt motor should face the other direction. Oooops!
At this point of the build I realized for the first time that something was a bit strange with the gimbal cables. I had to cross them to reach the appropriate connectors on the frame, which seemed a bit like a design flaw. But as it turned out later, I had misassembled the roll axis by 180 degrees, so the pitch motor facing the fpv camera instead of away from it. It took me until after the first power-up to realize this. The crossed cables lead to a second mistake: mixed up roll and pitch motors. The result of this is a hysterically spinning gimbal, rotating constantly as if were fully drunk. After fixing the gimbal orientation and connecting the motors into the correct pitch/roll connector everything was OK. The gimbal was level as expected. Wow, it looked cool!
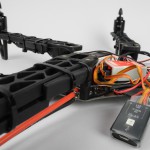
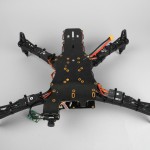
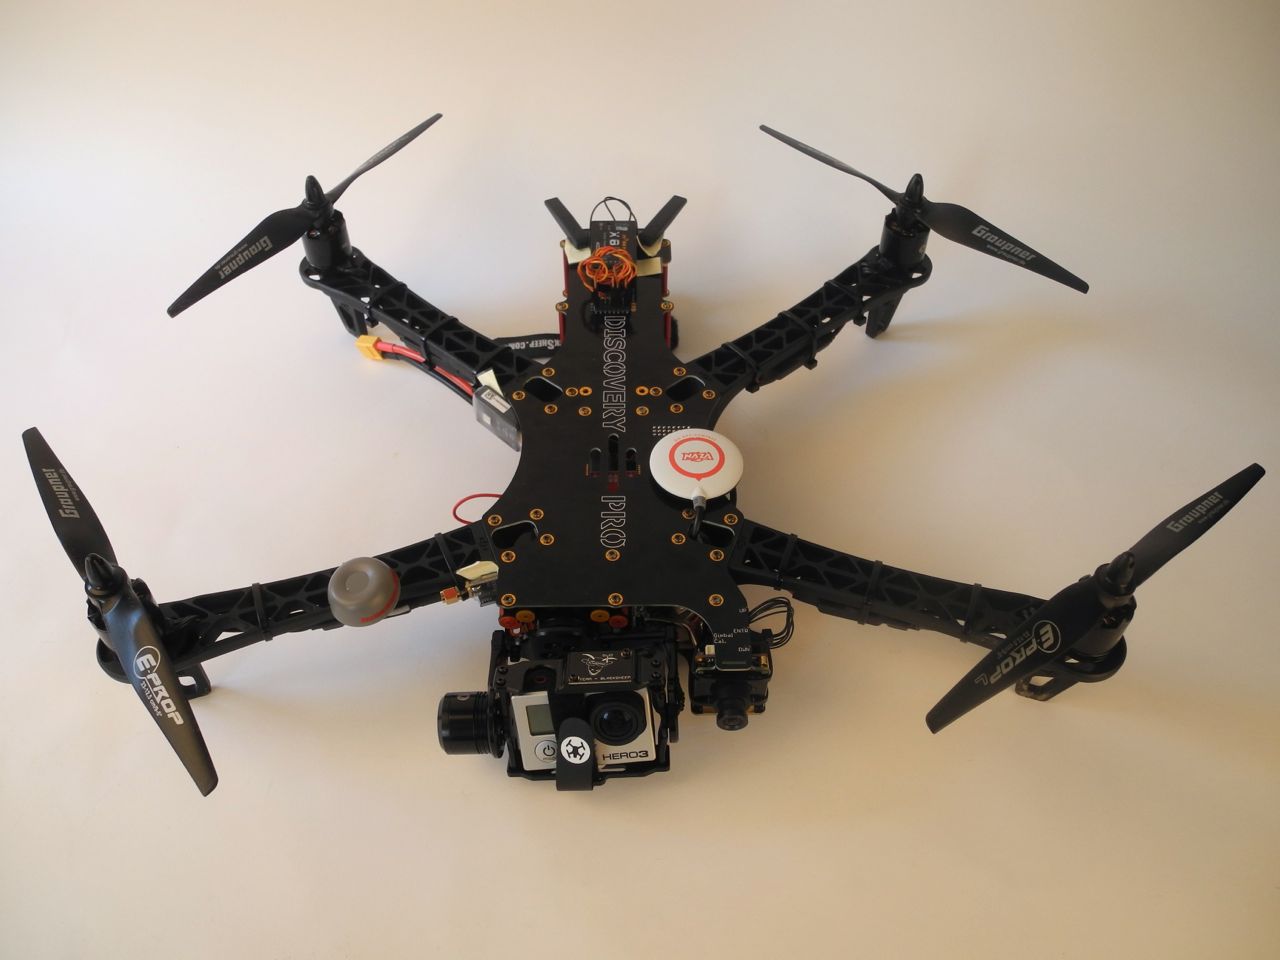
Fully assembled Discovery Pro
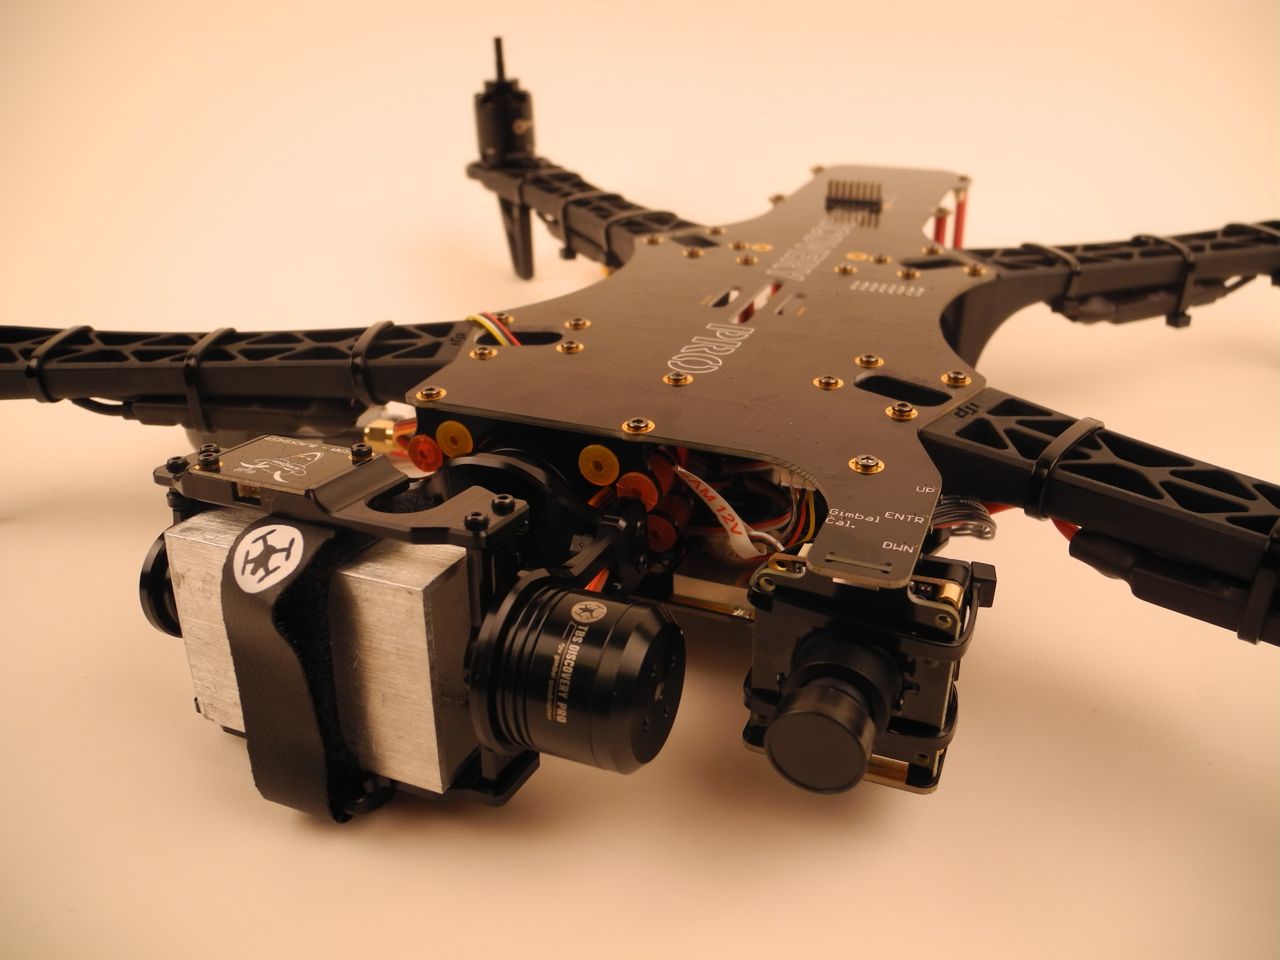
I finished the ‘mechanical’ part of the build by adding more electronics, such as the video transmitter with the 5.8GHz cloverleaf antenna on the front right arm and the FrSky RC receiver X8R in the back on top.
More images in the build gallery. In the next part of the build log I will set up the Taranis RC radio and NAZA flight controller.
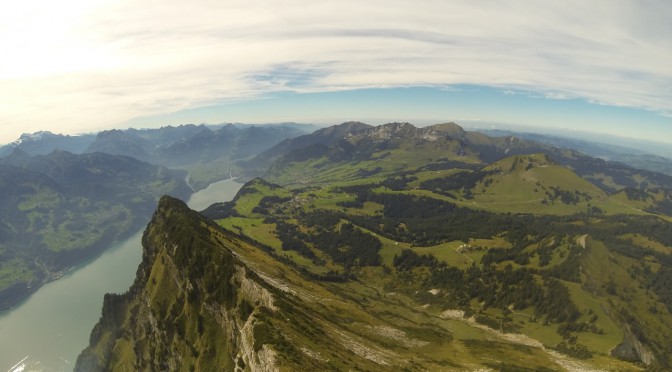
Hiking in Switzerland is great, but it’s even more fun if you bring you quadcopter! Enjoy this great video that I recorded along the hike from Arvenbühl up to the Leistkamm. Music Credits: Phase IV (lo-fi is sci-fi) / CC BY 3.0
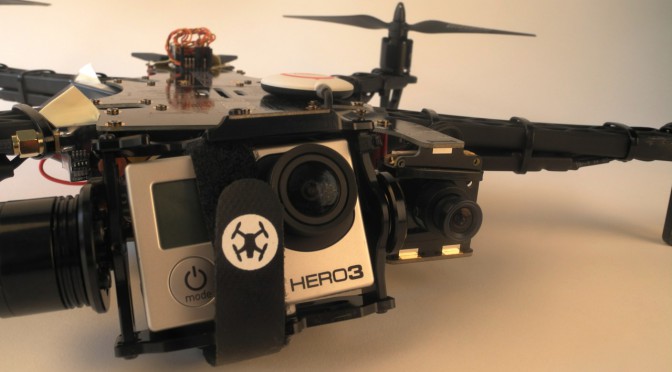
For filming I used my stock Phantom quadcopter with a GoPro Hero3. The hike itself starts in Arvenbüel (1273 m) and takes about 2h40 to climb up to Leistkamm (2101 m) and another 2h to get down again. The view along the hike is very rewarding, especially on top where you are standing on a small rim. To the west is Lake Walensee, to the south you are looking along the Churfisten rim, of which Leistkamm is the most Northern one.
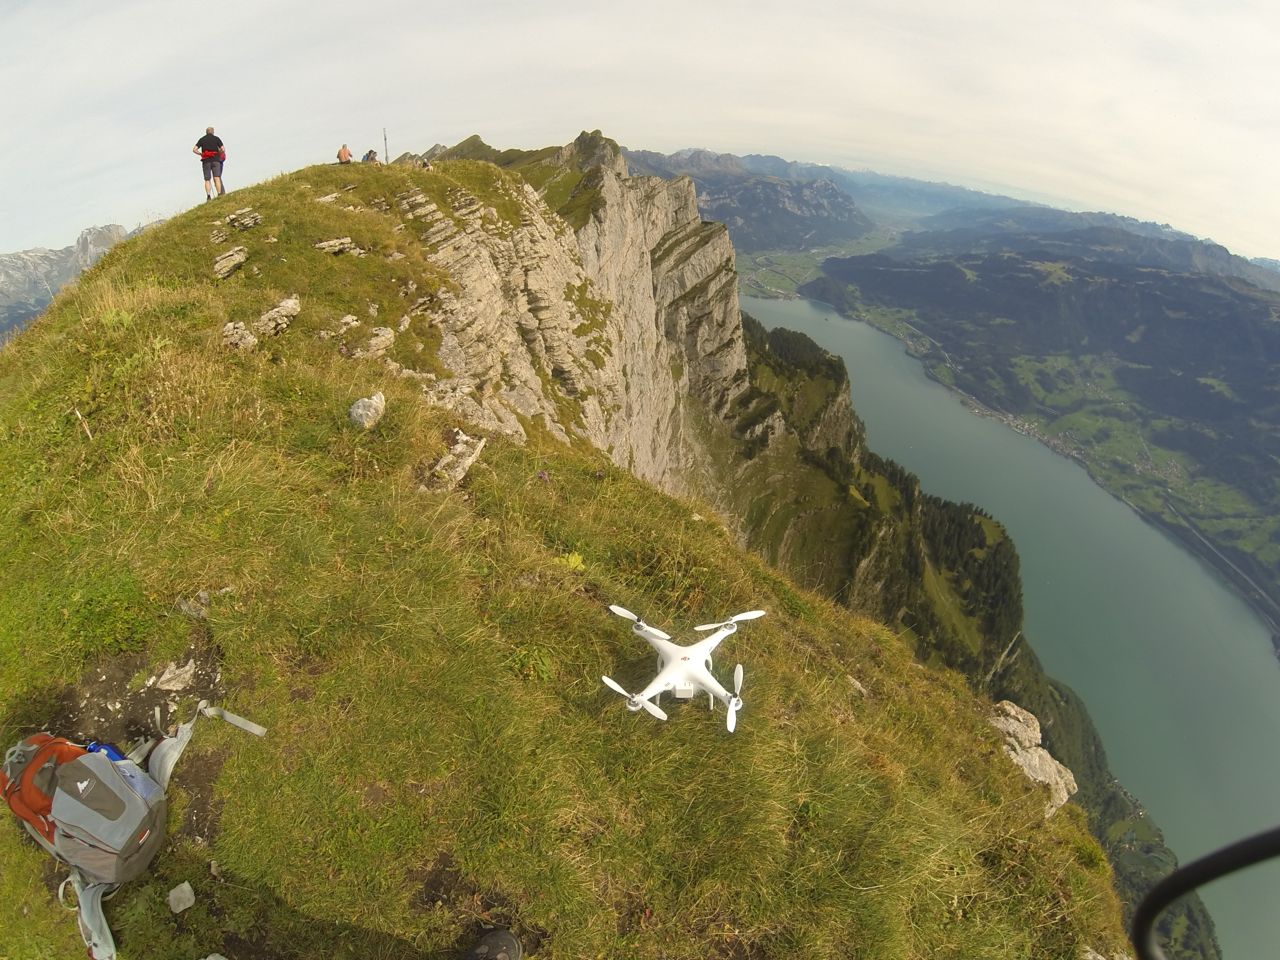
Phantom and backpack on top of Leistkamm in Switzerland.
During the hike, I strapped the Phantom outside onto my backpack. Batteries and remote went inside. All in all it’s still pretty light and I can definitely recommend taking the Phantom with you all the time! So, stay tuned for more great videos from FPVblog.com
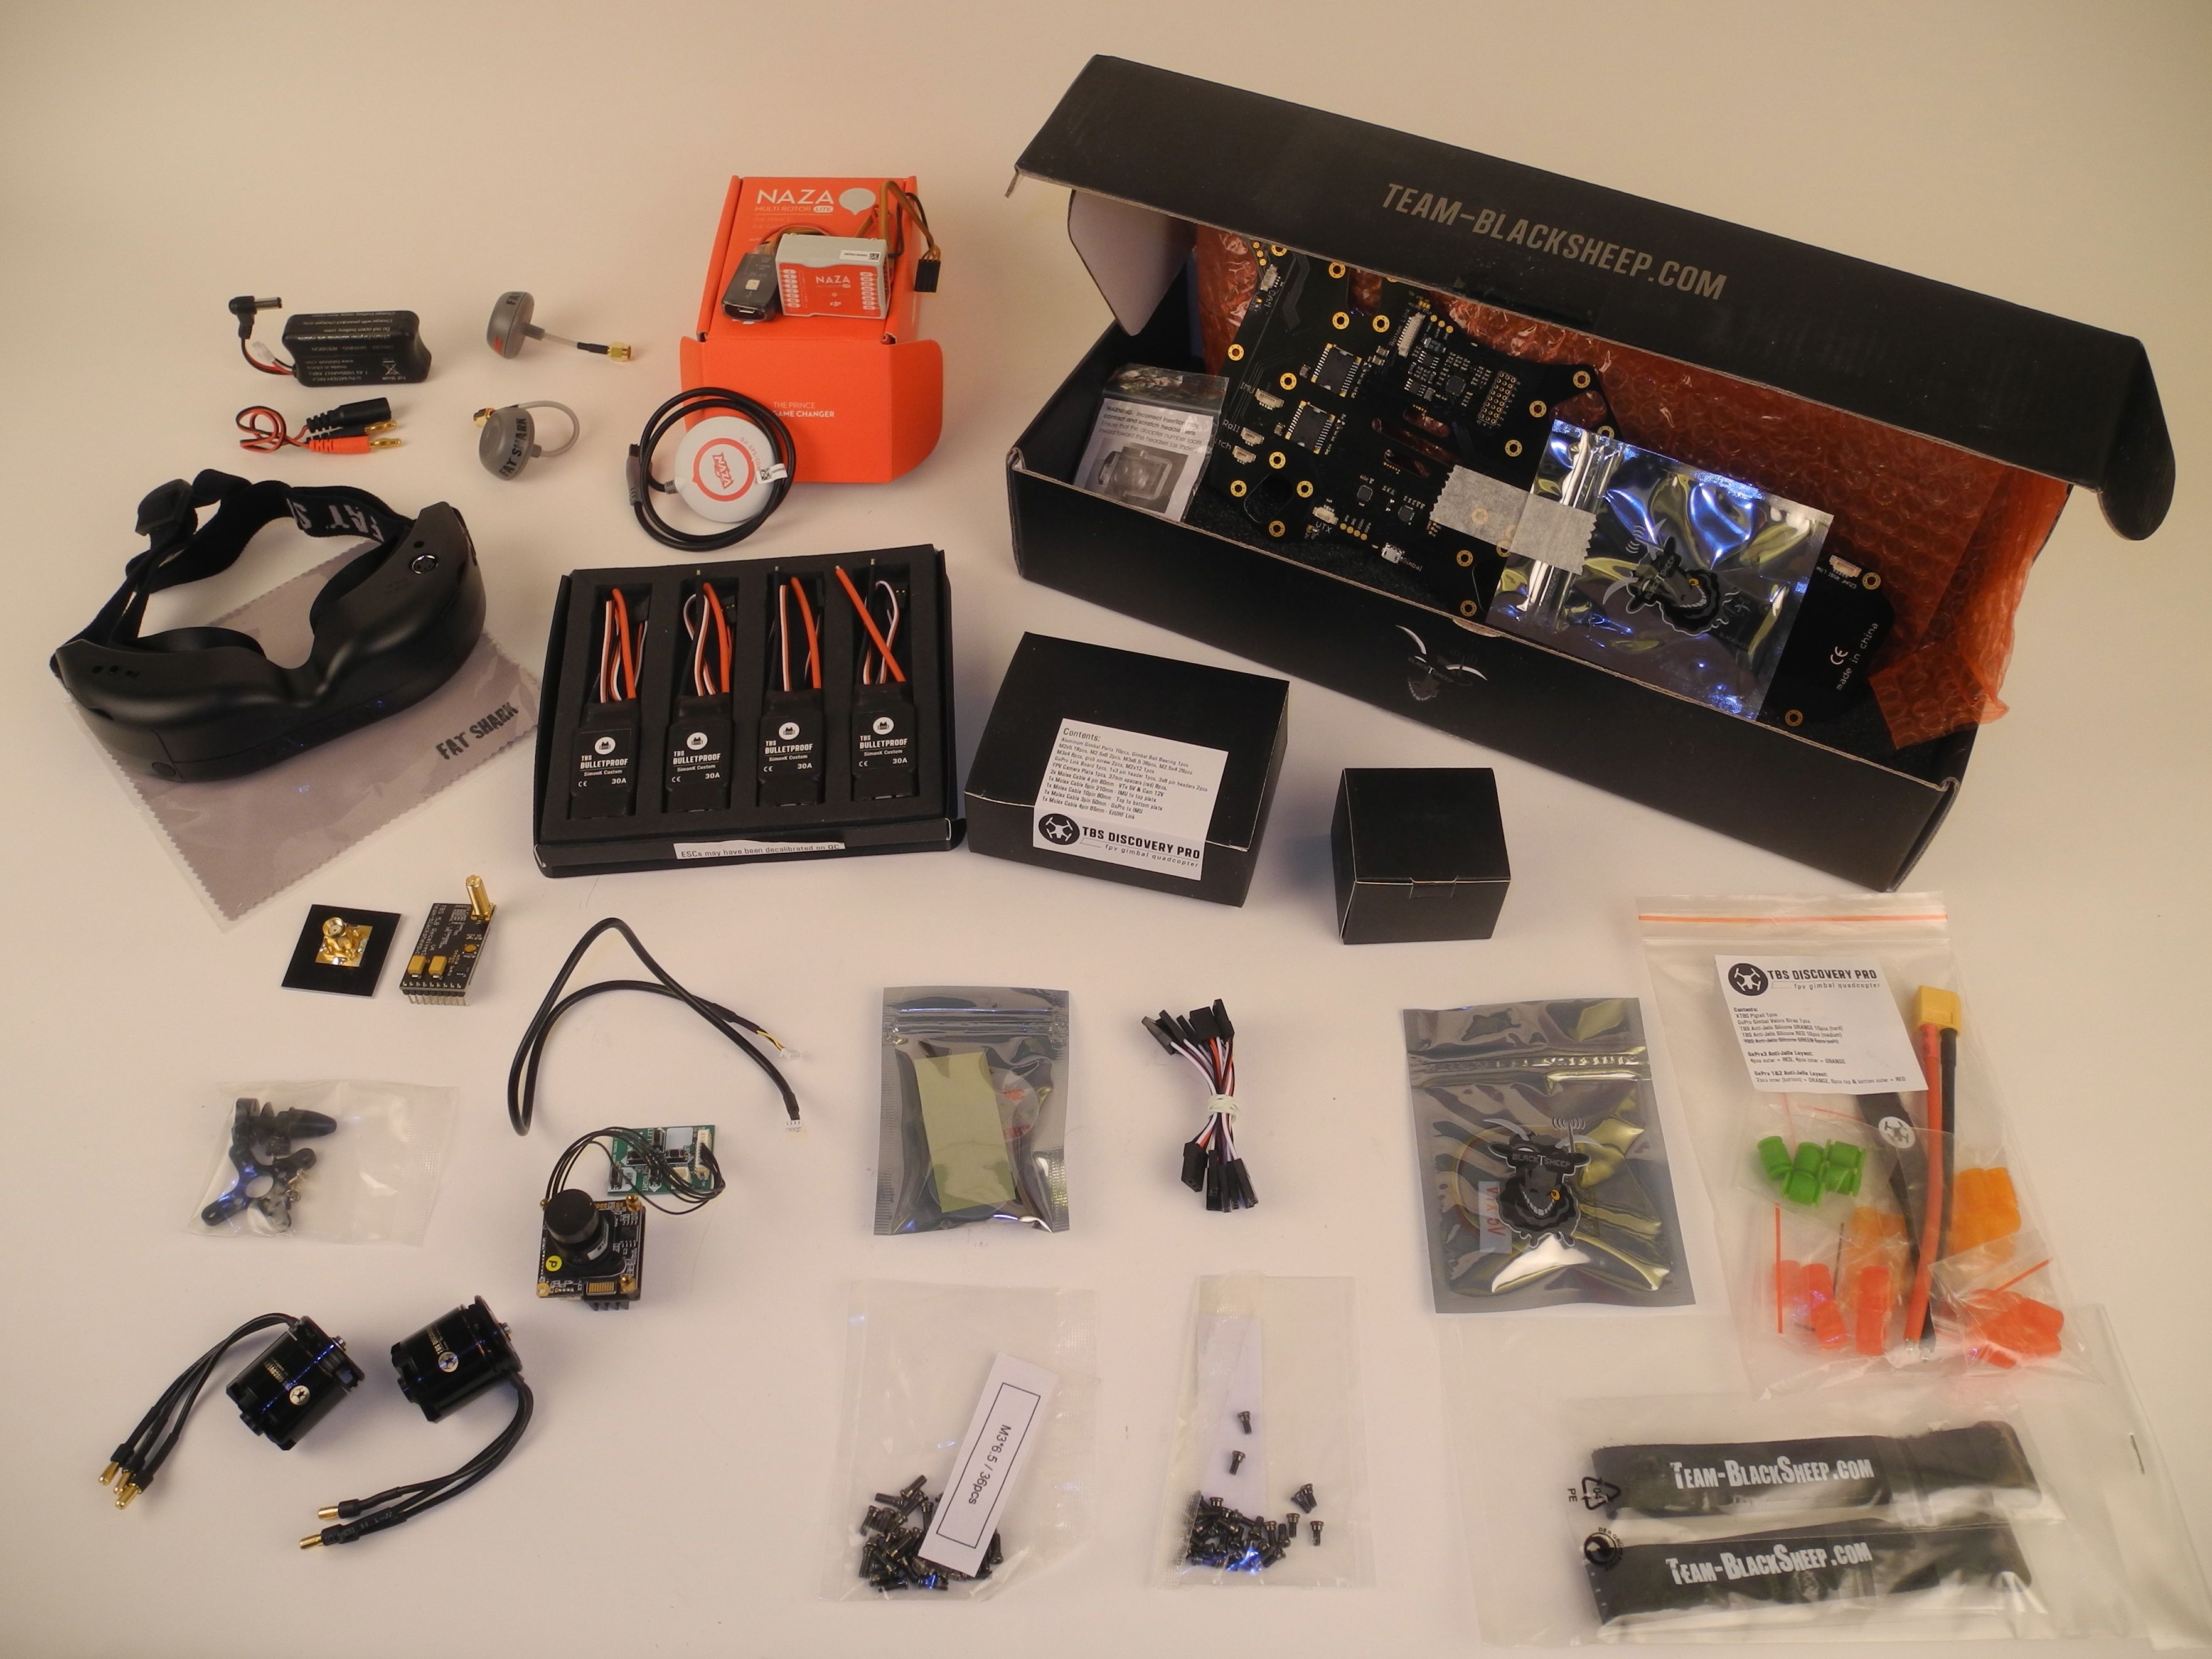
Soldering iron, screwdrivers, zip ties, loctite 222 (the purple one)
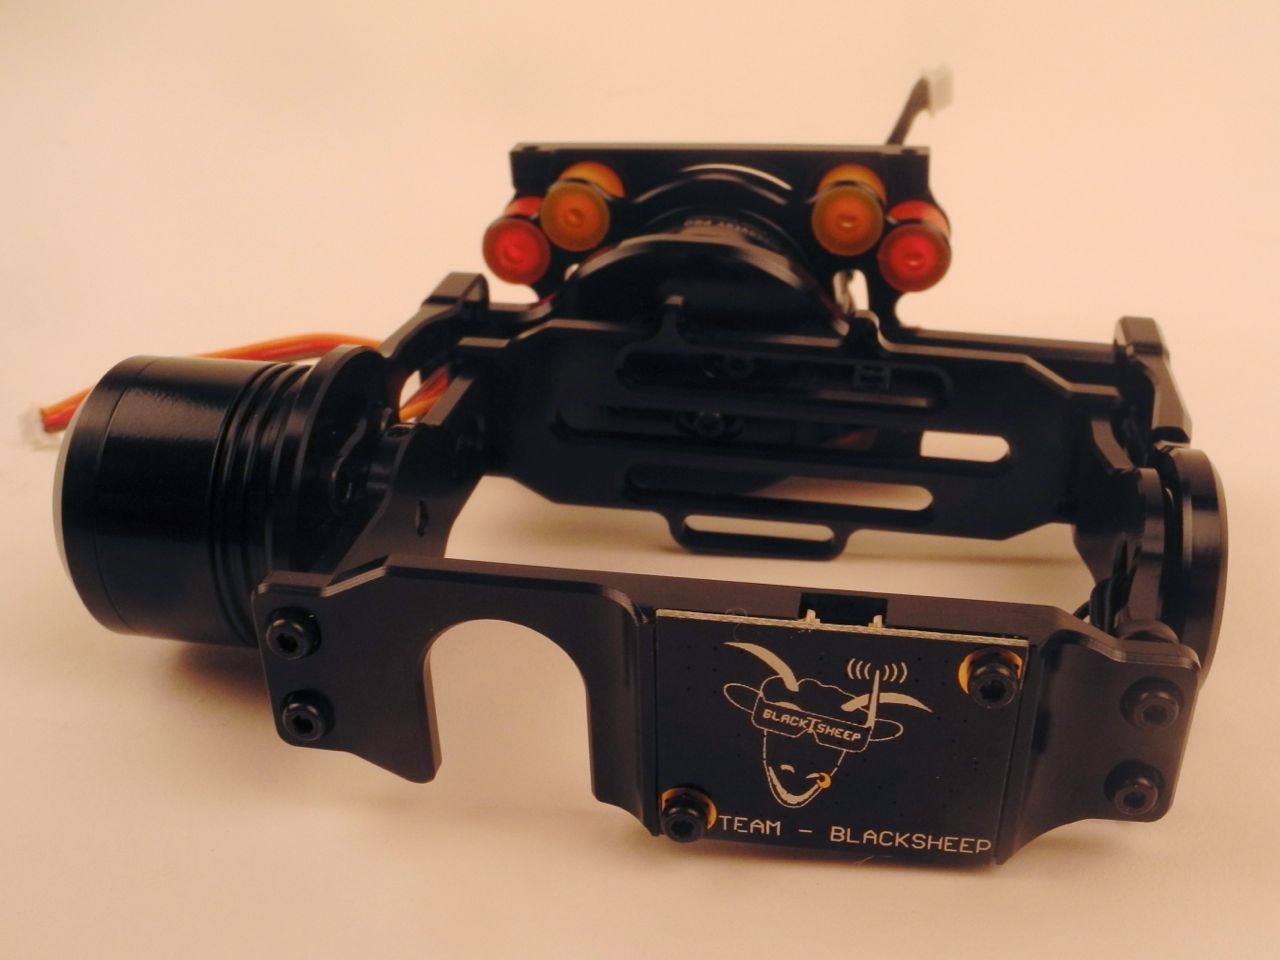
I’ve started with the gimbal assembly, a big puzzle with motors, screws and aluminum parts. The small screws are for the metal parts and some of the short bigger ones (from a separate bag) are for the gimbal motors. The small electronic board was a little bit too big, but after grinding the board on two ends by fractions of a millimeter it fit snugly into the holder. Two tiny little grub screws are used to hold the tilt motor. One is not enough as I had to find out. The cables are attached with zip ties, which have to be attached exactly how the video shows. Otherwise the ends of the zip-ties collided with other parts, preventing the gimbal from turning freely. For the time being I chose the standard red and orange damper configuration. However, this might change as the dampers need to be fine tuned. There are reports of vibrations with the standard setup. All orange seems to be a good option too. I will have to test this out. [Update] The roll axis on my build is 180 degrees wrong and should be flipped around. While the GoPro cage is upright, the dampers are upside down. They should be forward on top and backward on the bottom for a push/pull configuration. [/Update]
Fully assembled gimbal from the front.
Next, I put the gimbal to the side and started with the frame by soldering the ESCs and the battery connector. I started out with a very fine soldering tip but this did not work and I had to mount a fatter soldering tip which could deliver enough heat. This was fairly easy. And I completed the work on the bottom plate with gluing the Naza flight controller with a 3M patch.
Disco Pro ground plate with Naza Light in the center and the dji power unit on the bottom
Last step of the today was assembling the Tiger 900kv motors. I removed all the screws on the prop holders and mounted them with loctite to the top of the motors. Then I found out that short silver screws and the cross piece in the package are not used. Instead the motors are directly bolted onto the arms with screws out of one of the bags. The quality of theses screws however gave me headaches. None of my standard screwdrivers had a tight fit. Finally, I used a hex key to tighten the screws on the arms. I did not use loctite for now, as the arms are plastic. But if they come loose I might have to reconsider this.
That’s all for the first part of my build log of the TBS Discovery Pro. So far I am positively surprised about how everything is designed (minus the screws). The official build video is sometimes a bit too fast and I needed to rewind it many many times. Stay tuned for the next part of the build!
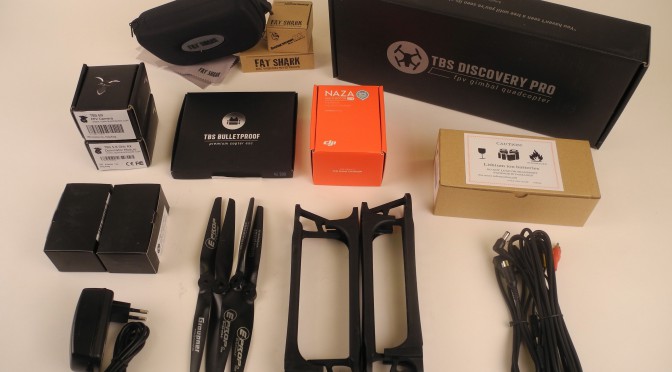
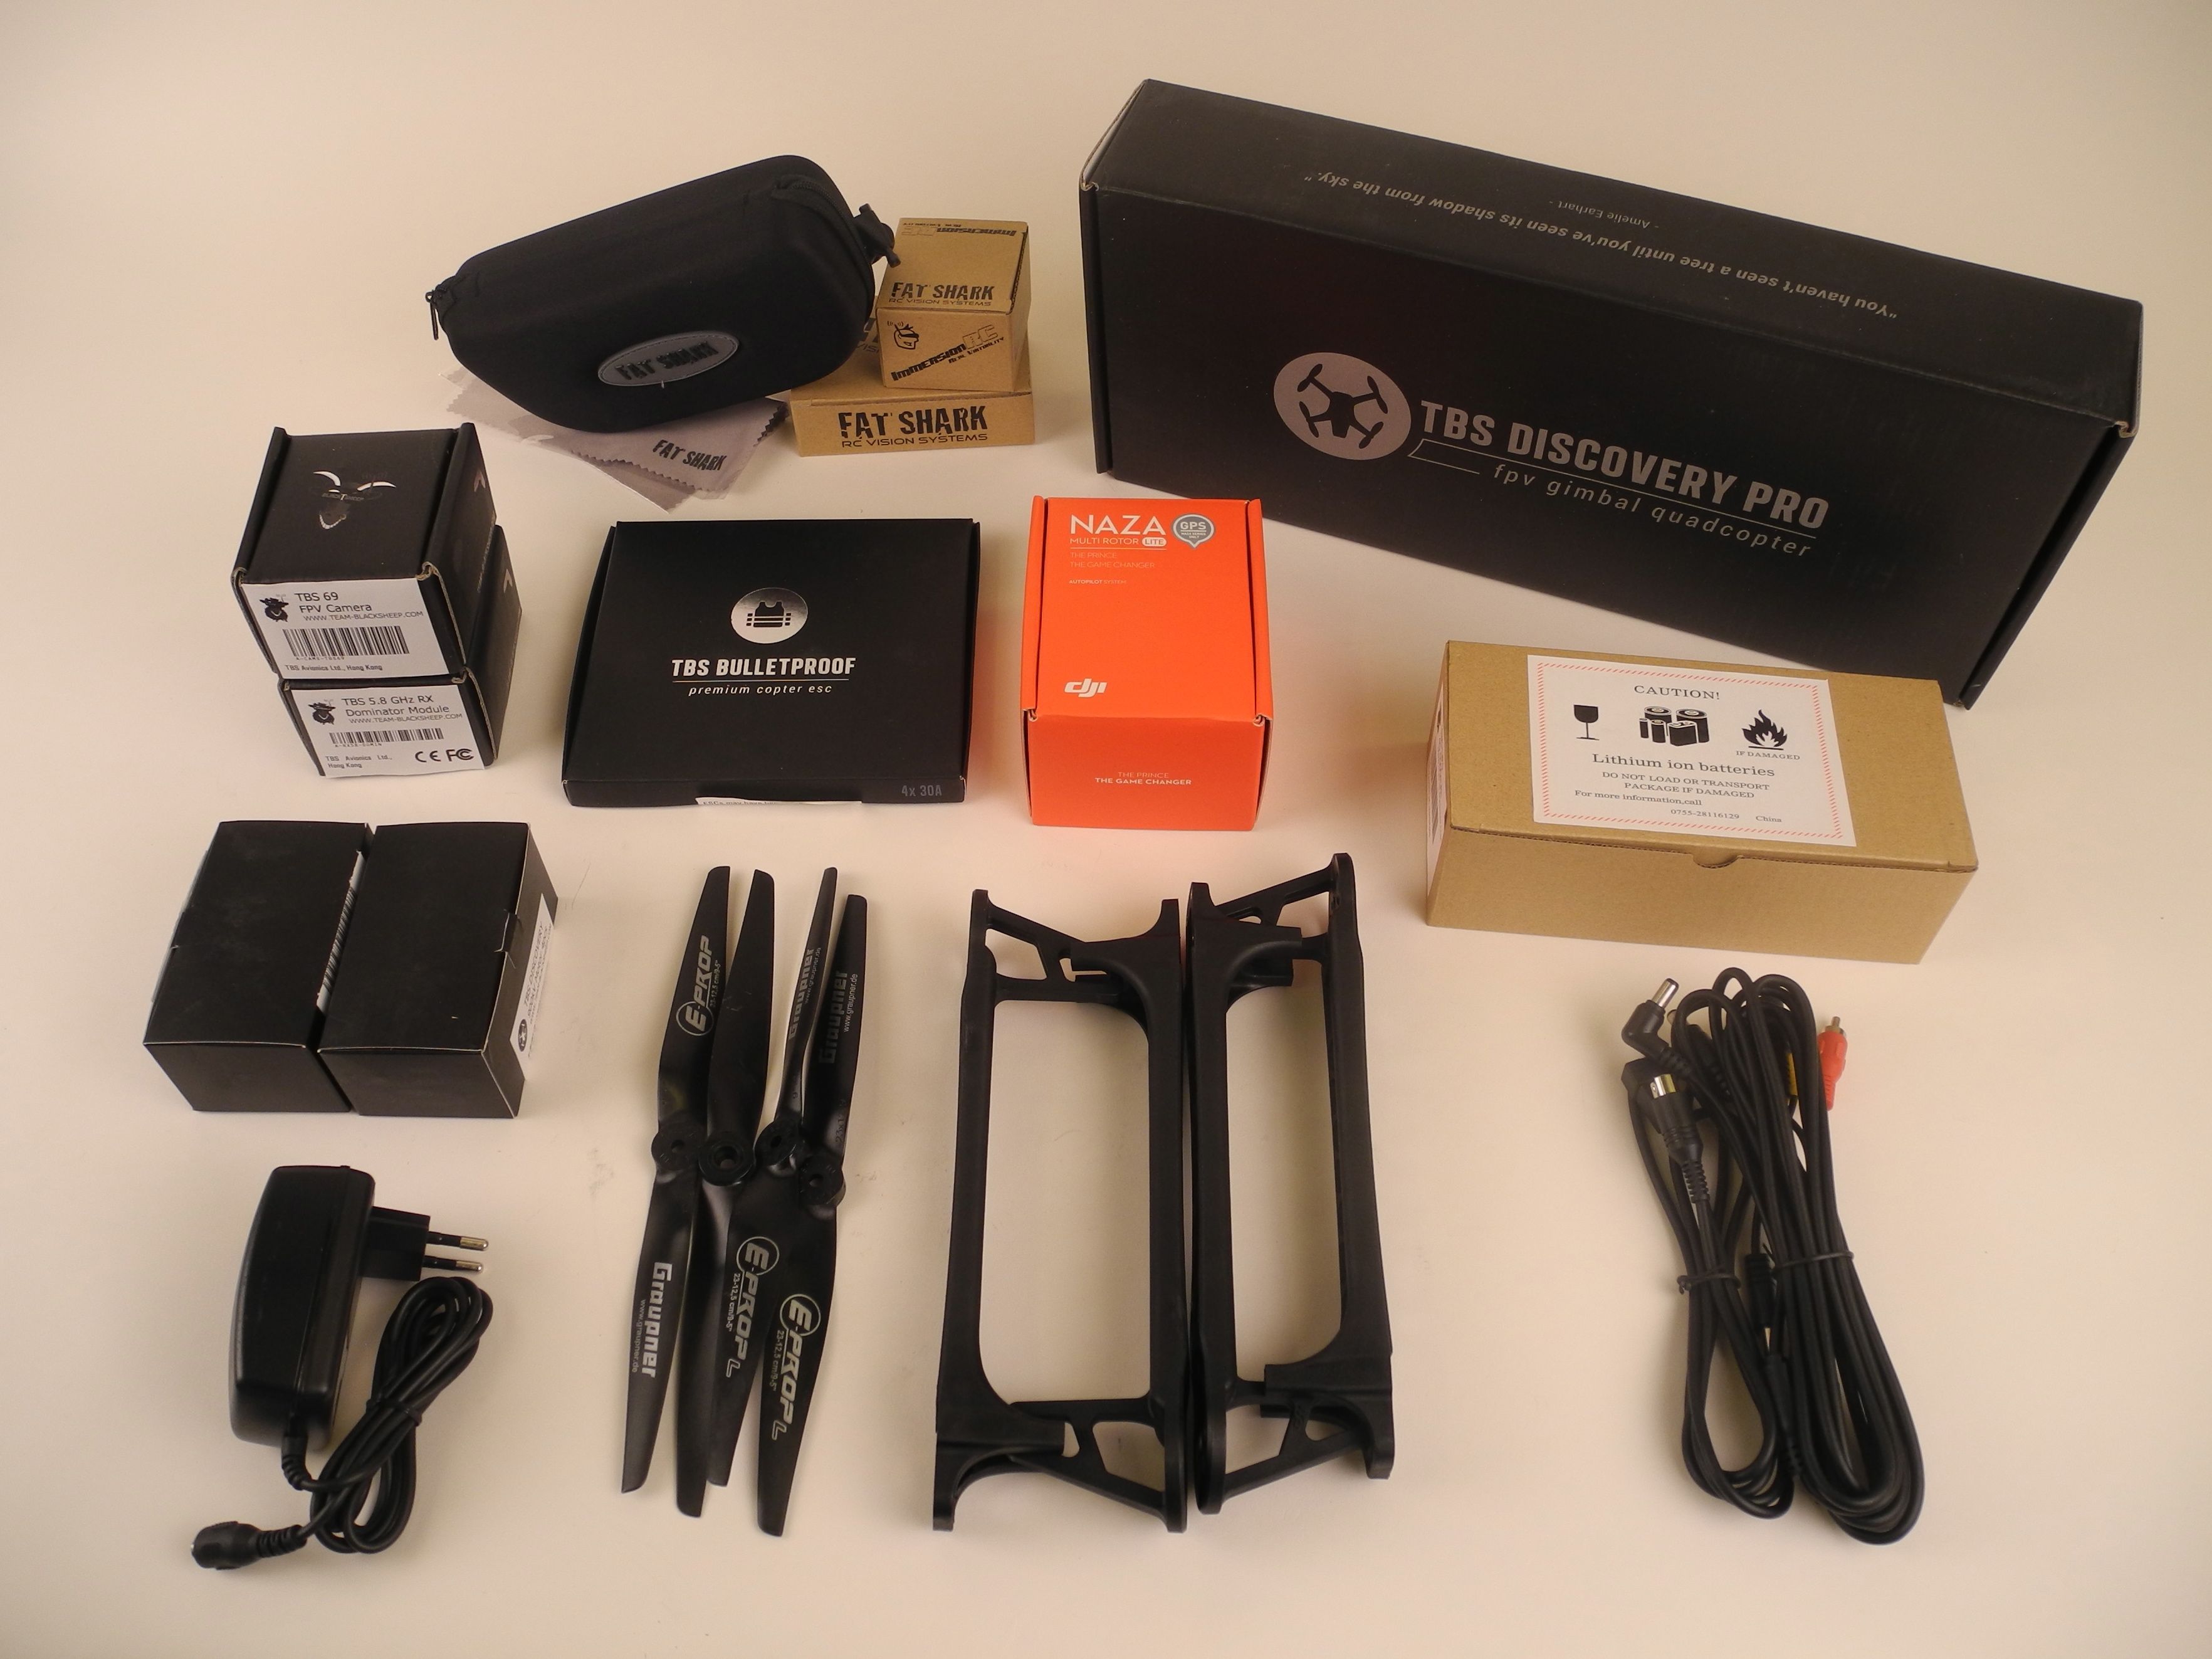
Today, my brand new discovery PRO quadcopter arrived. Hurray! It looks awesome. But have a look yourself!
The TBS Discovery PRO, how it arrived in the box. Plus googles, arms, Naza, etc.
Besides the actual frame kit in the big top left box, I also added goggles, the Naza Light flight controller, arms, props and a 5.8 GHz video link. I’m really blown away by all the beauty. Let’s start the build and get everything assembled and configured!
A sneak peek into the boxes with all the nice little parts. Now the puzzle begins…