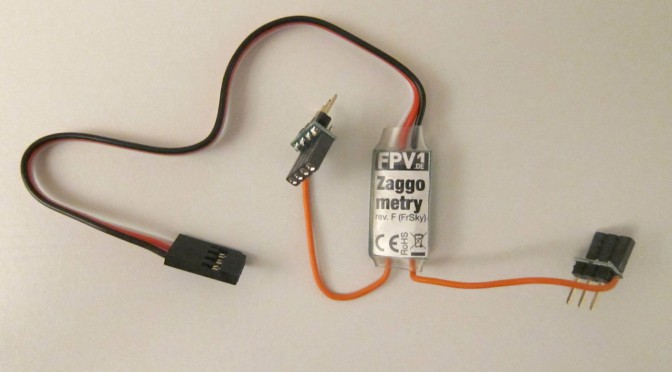
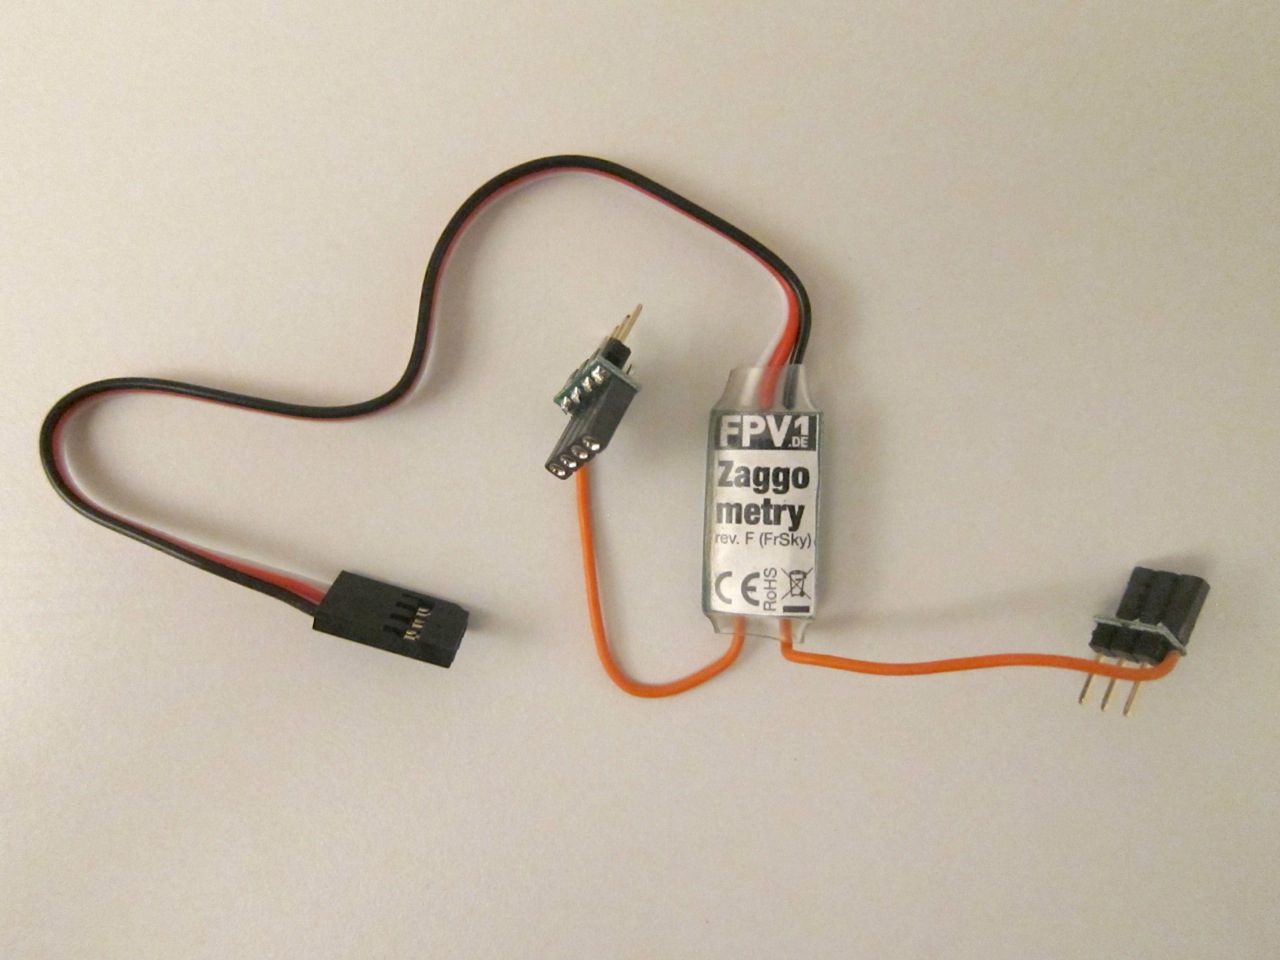
The Zaggometry is a clever little piece of electronics which can read the NAZA GPS coordinates of you copter and send it over the telemetry link down to your Taranis RC-remote for display and logging. In other words, it is a bit like a Flytrex Live flight recorder for your Taranis. The 29€ Zaggomety was developed and is produced(!) by Eberhard Rensch in Germany. In this article I would like to show how I installed it in my TBS Discovery Pro and the data I logged during a test flight (video).
Installing the Zaggometry in the TBS Discovery Pro
The Zaggometry connects on one end to the telemetry port on the X8R receiver and on the other end to the NAZA flight controller. For sensing the GPS location and LiPo voltage it comes with two adapters which have to be inserted into already existing cables. The 4-pin adaptor sits between the GPS connector and the NAZA to read the location. The 3-pin version sits between the NAZA and the PMU to read the LiPo voltage. The space on a TBS Discovery Pro is quite limited, especially between the battery compartment and the GPS connector.

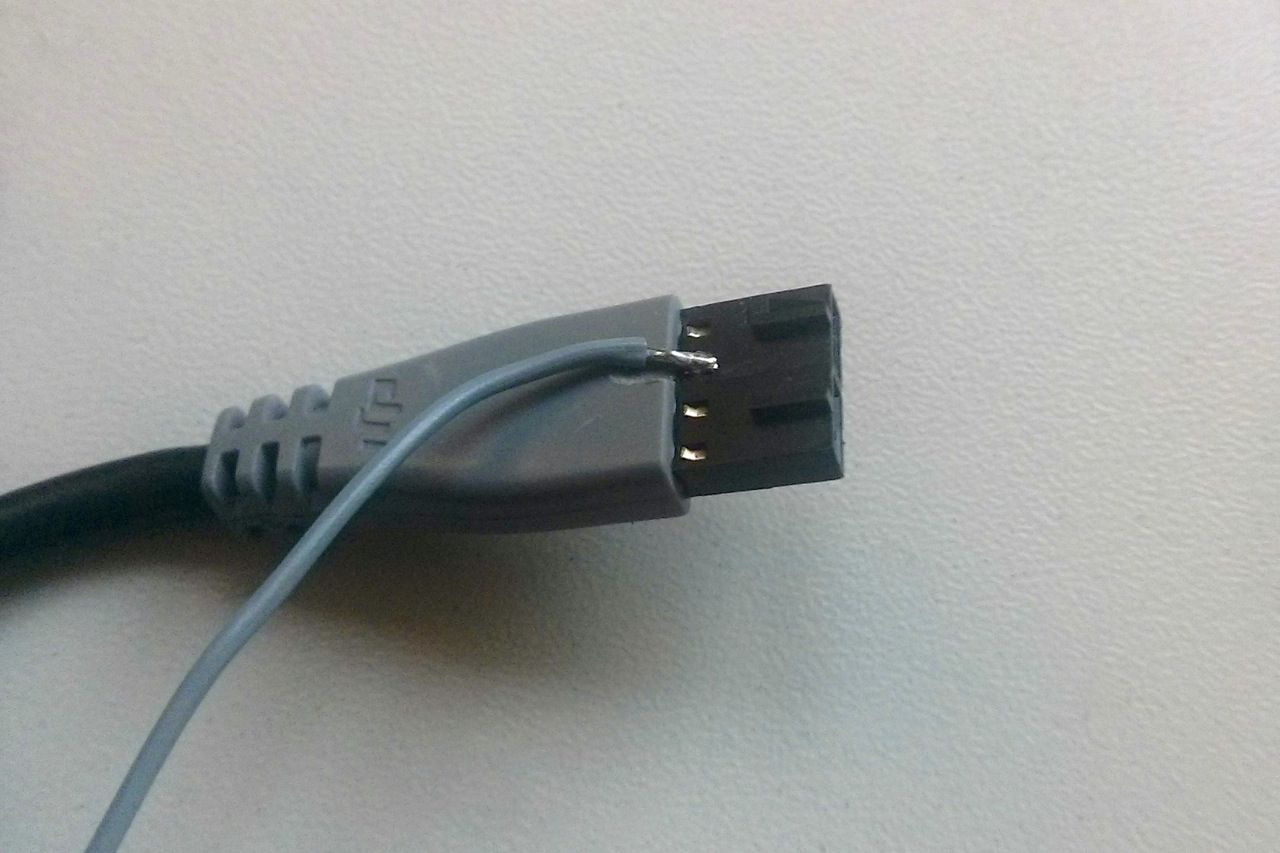
The Zaggometry extends the GPS connector all the way into your battery compartment causing mechanical strain on the GPS connection. Therefore, I decided not to use the connector from the Zaggometry. Instead I soldered the wire directly to NAZA GPS connector.
Logging and visualizing on the Taranis
Once everything is connected, the new telemetry data is automatically transmitted and the Taranis can display the real-time data on the telemetry screen or logging it to the SD card. The type of data displayed on screen as well as the SD logging function are configured in the model settings. I’ve updated my Taranis model file which you can download here. Coming soon.
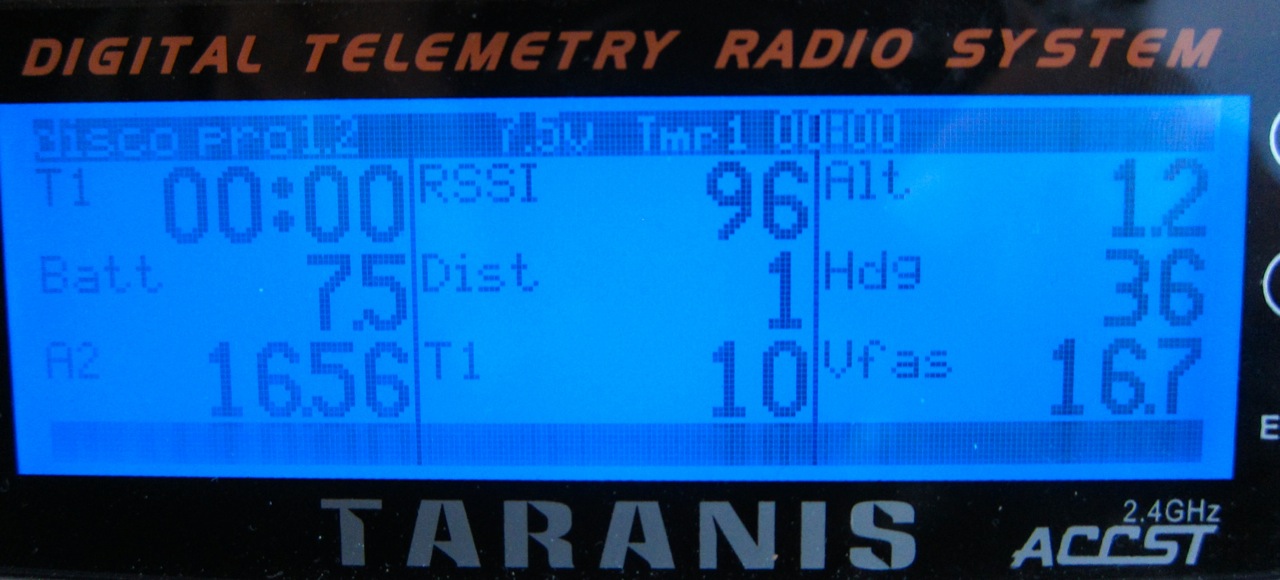
GPS support was added to the Taranis firmware v1.1.01 (corresponding to openTX r2822) in October 2013. If your radio is from one of the first batches before that date, you might want to upgrade directly to openTX 2.0, which I did.
Test Flight
I did a first test flight which you can see on this map and in the video. I am still trying to find you a best way of visualizing the flight path. So far I am manually converting the GPS coordinates in a spread-sheet and then converting the results into GPX format.
[map style=”width: auto; height:400px; margin:20px 0px 20px 0px; border: 1px solid black;” gpx=”http://www.fpvblog.com/wp-content/uploads/Sheet111GPXsimple.gpx” elevation=”no”]
First overal impression
The Zaggometry works out of the box, is simple to install but still has some minor bugs (v1.1) which need to be ironed out in the firmware. For me, it deserves huge credit for allowing to connect devices of two different manufacturers, here DJI and frsky. Compatibility between competing manufacturers is still very limited in the RC world. The Zaggometry fills this gap very nicely. The test flight was done with v1.1 of the Zagometry firmware. As one can see this firmware shows some GPS path artifacts (rectangular corners) which must come from latitude and longitude not being updated correctly. Furthermore, it has some more known smaller bugs. If you want an alternative for a FlyTrex with works with your Taranis I can highly recommend the Zaggometry. It might need one or the other firmware update which is a bit tricky to do, in order to mature.
Updating the Zaggometry firmware to v1.2
If you buy your Zaggometry now, you will most probably want know how tricky it is to upgrade the firmware in the future. In general you need some extra pieces of electronics and a terminal program. It is not overly difficult, but it is not plug-and-play like the normal operation of the Zaggometry. It requires some lower-level knowledge of how to connect an FTDI board with a terminal program. It has simillarities to programming an arduino. The process is described in their manual. I used this FTDI board from watterot, but any 5V version should do the trick. As an OSX Maveriks user I had remove the faulty Apple driver and install a new one, as described here, otherwise the firmware upload gives errors. Good Luck!
Thanks you for the great review!
I got my Zaggometry today and installed it. Will perform a test flight now.
Best regards,
Tolga
Hello, when will the zaggometer be in stock again? Thanks, Alan
FPVblog is not affiliated with the manufacturer. Please check the availablility on the shop website.
Hi, Thanks for the review. I have two of the units, but can not get the Taranis to discover the telemetry data stream.
I’m running openTX v2. The Zaggometer YouTube on configuring the sensors is for the old version (T1 and T2), so I can’t follow their ‘instructions’.
Thanks for your help.
Hi Ben
Did you fix this? I am having same issue with mine, no response from seller either